I will try to give you some tips to realise nice freecraft icons.
First of all, I'll assume that you have the gimp proerply installed.
In order to keep some coherency, the most used ressources (gradients and brushes) can be found here.
Untar it with the command tar -xvzf gimp_ressources.tgz , then move the brushes directory in your ~/.gimp-1.2/brushes/ directory and the gradient directory into ~/.gimp-1.2/gradients/
I apologize for the approximative name of the gimp tools, but my version is localized in french ...
If you have a graphic tablet (if you don't have one, you should consider buying one, it's really easier with, and it's quite cheap [about 100 euros for one with pressure]), the parts you should use it are written in italics.
Step 1 :
Think about to what will your icon represent and imagine a simple way to give the information.
Step 2 :
- Create a new 92x76 image with a white backgound
- Add a transparent layer
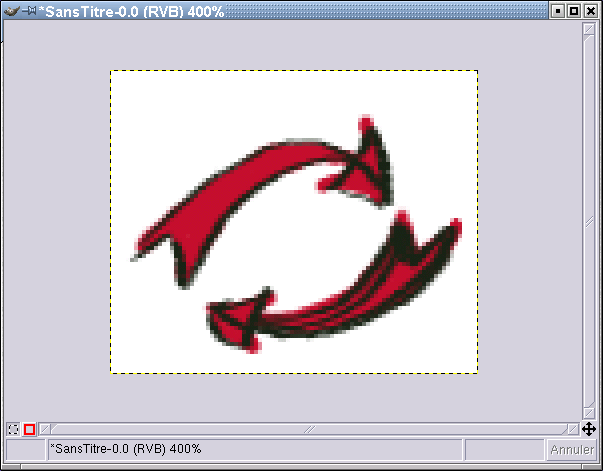
- Realize a quick sketch in the gimp with the ink tool [adjust size : 0.9, zoom level 400% or more]

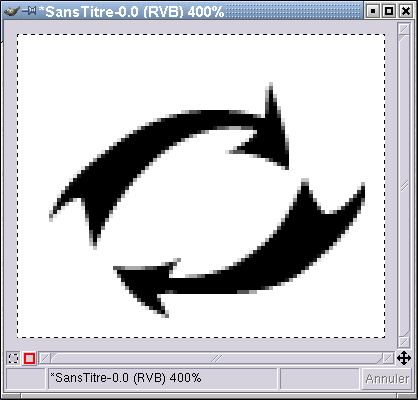
Step 3 :
- Add a transparent layer under the sketch layer
- With the paint tool, colorize the full shape
Step 4 :
- Hide the sketch layer
- With the magic wand [sensibility 70], select all the painted zones, maintaining the shift key
- In the layer dialog, choose the path tab, and transform your selection into a bezier path
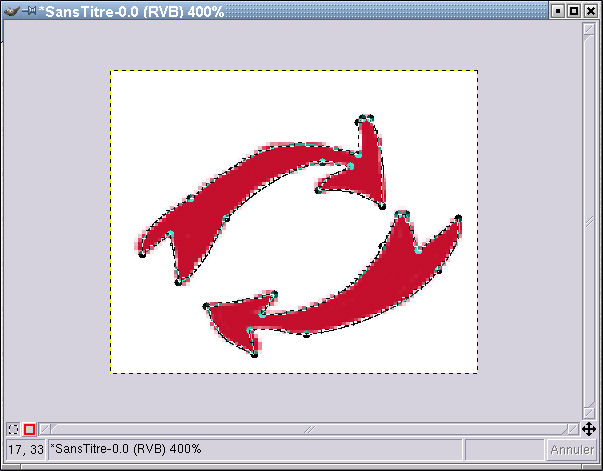
Step 5 :
- With the remove point button [still in the layer dialog, path tab], remove all the unneeded points. The resulting figure must be really simple
- With the edit point button, make the bezier curve stick as much as possible to the shape [maintain ctrl to move a point, shift to move only one control of the point]

Step 6 :
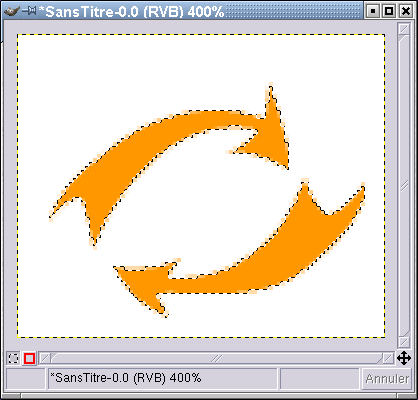
- Now, transform you path to a selection
- Hide the shape layer, and create a new transparent one
- USe the bucket fill to fill the selection
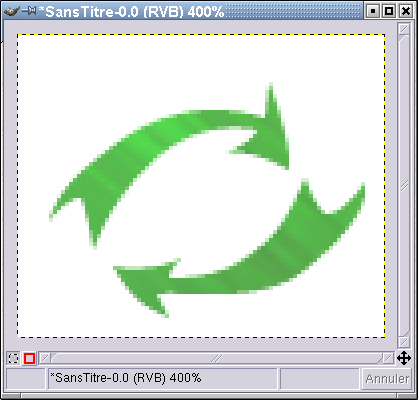
Step 7 :
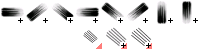
- Choose a gradient form the ones startin by fcgp_
- Choose one of the following brushes :
- Unselect all [ctrl shift A] and toggle keep transparency on
- select the paint brush, toggle gradient on
- paint your shape !
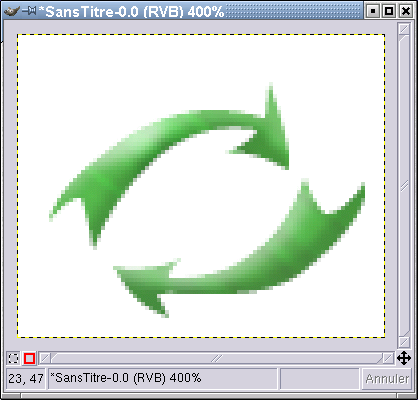
Step 8 :
- Choose a small round shaped brush
- select the paint brush, toggle gradient off and set the transparency to 15 - 20 %
- select the white color and add some light at the left top of the shape
- same thing in black for shadows
Step 9 :
- Duplicate the current layer
- Hide one of the clones, and toggle keep transparency on
- select all [ctrl A]
- fill in black with the bucket.
Step 10 :
- Toggle keep transparency off
- Call an IIR Gaussian blur filter with a radius of 5
- Unhide the original and shift it into the top/eft direction

Step 11 :
- Hide the white backgound layer
- Save you icon in both png and xcf format
- Send an email to the FcGP maintainer with a link to your work !
